Wednesday, June 29, 2011

Freebies and Coupons!

I have really become addicted to couponing over the last few months. At first, I didn't know much about using coupons, except the obvious, it'll save me money! After researching and learning some tips I have finally gotten it down. I'm no extreme couponer, by any means, but I have cut down the cost of our grocery bill and learned to save on just about everything we buy. I've also started signing up for freebies. One of the best places to do that is on Facebook. Just about every brand of everything is on Facebook and they offer coupons and giveaways. I went out Sunday to buy the paper so I could get the coupon inserts. Well lo and behold every Sunday paper in this town was sold out! Just my luck! So I came home and decided to ask on FB if anyone who gets the Sunday paper doesn't use their coupon inserts. I got a response from a super nice lady saying she had some from not only this weeks paper, but a few months worth! Cha-ching! I knew I was on a money saving mission then! She was nice enough to drop them off to me. She gave me 9 in total! How awesome is that??? Then today when I checked my mailbox I got excited all over again! I recently "liked" Tide over on Facebook and signed up for a free sample of the new Tide Stain Release. Little did I know, but what they called a sample was a whole bag! Wooooo hooooo! I'm so excited and can't wait to try these! Along with the bag was also a sample of Tide laundry detergent and a coupon! Go on over to Facebook and "like" Tide!


The SS (SmartSource) and RP (RedPlum) inserts that I was given! There was also a P&G insert with these as well. The P&G insert has so many great coupons that I just put the whole thing in my purse and keep it with me!


The AWESOME bag of Tide Stain Release and the sample of Tide detergent I received in the mail today! I will let ya'll know how I like it as soon as I try it out.


Here is a list of some great sites to check out that will help you with using coupons and scoring freebies.


1. Southern Savings and Deals
2. Passion for Savings
3. The Krazy Coupon Lady -As seen on TLC
4. Smart Couponing

Sunday, June 26, 2011

Yellow and Blue


Hey guys! While at my parents' house today for Sunday dinner I had to snap a pic of the back of the house. It was just repainted and I LOVE the bright yellow. I think it's beautiful! Someone had the nerve to tell my parents they didn't like it. Hello!?! They didn't ask "you" and "you" didn't pay for it so therefore if "you" sir don't have anything nice to say then just don't say anything at all. :) It wouldn't have bothered me had someone of said that to me, but since it was told my mama and it hurt her feelings it ticked me off. I never like to see my mama hurt in anyway, even though that was minor, regardless. Some people just don't know how to be nice. Any-who, here's a pic taken at the back door! I'll show ya'll the big beautiful front porch later, I'm going to do a before and after post of the front porch when me and mama finish it, as well as her kitchen redo!I love this yellow! It's soooo my mama! She's like a bright ray of sunshine in my life, my best friend!


Here's the blue in today's post! Our new little blue pit bull puppy, Cali, as in Caliente, not California. We've had her since she was about 4 weeks old, her mama was ran over when the pups were 3weeks. She's a little butterball now at 7 weeks.


This is my favorite pic of her. I took it today while we were outside playing.

This is Cali and her brother (from another mother, lol) Little Man. He's our shih-tzu. She was trying to crawl and sneak up on him but he saw her. That's my 2 babies!

Saturday, June 25, 2011

Going Green.....

Back in December (yes, DECEMBER!) I got the best buy, EVER! I scored an antique dining room table and 6 chairs for $10! Ten bucks people! I know I know....awesome-ness. Well since Dec. it's been sitting in my dining room waiting on me to decide what I'm going to do to it. Before I decided I felt that I needed to find the perfect companion for it, a beautiful china cabinet. A few weeks I got super lucky on Craigslist and found that perfect companion, for $50 in PERFECT condition. Since the table and chairs needed work, lots of work, I knew I needed to find a china cabinet that need little to no work or I'd never have decided how I wanted the 2 to look. Yes I can make decisions, no it's not easy when I have 1,001 different ideas. So, now that I have the china cabinet I went out and found the perfect fabric for the chair cushion. A beautiful green fabric shower curtain at a discount store for $2. I knew it was "the one" when I spotted it. So this evening I began the task of recovering the chair seats. Not only do they have to be recovered, but I also have to sand and stain and varnish the chairs AND then put better braces on all 6. :| Fun fun....some what. I keep thinking I want to give in and paint the table and chairs white. For now though I've got to get them at least covered because I have a party coming up July 7th and these chairs have to be at least sit-able. So here's what I have so far!


This is the before, kind of. This pink actually had shelf liner or wall paper on the top of it!


After! I love love love this green. My decor in my kitchen is yellow and green and this goes perfectly. I'm thinking really hard about painting the chairs white, but I'm not sure. I will let yall know what I decide.


Everyone have a great Sunday. I'm about to head to my mama and daddy's and get my grub on! Be blessed yall!

Wednesday, June 22, 2011

Easy DIY Napkin Rings


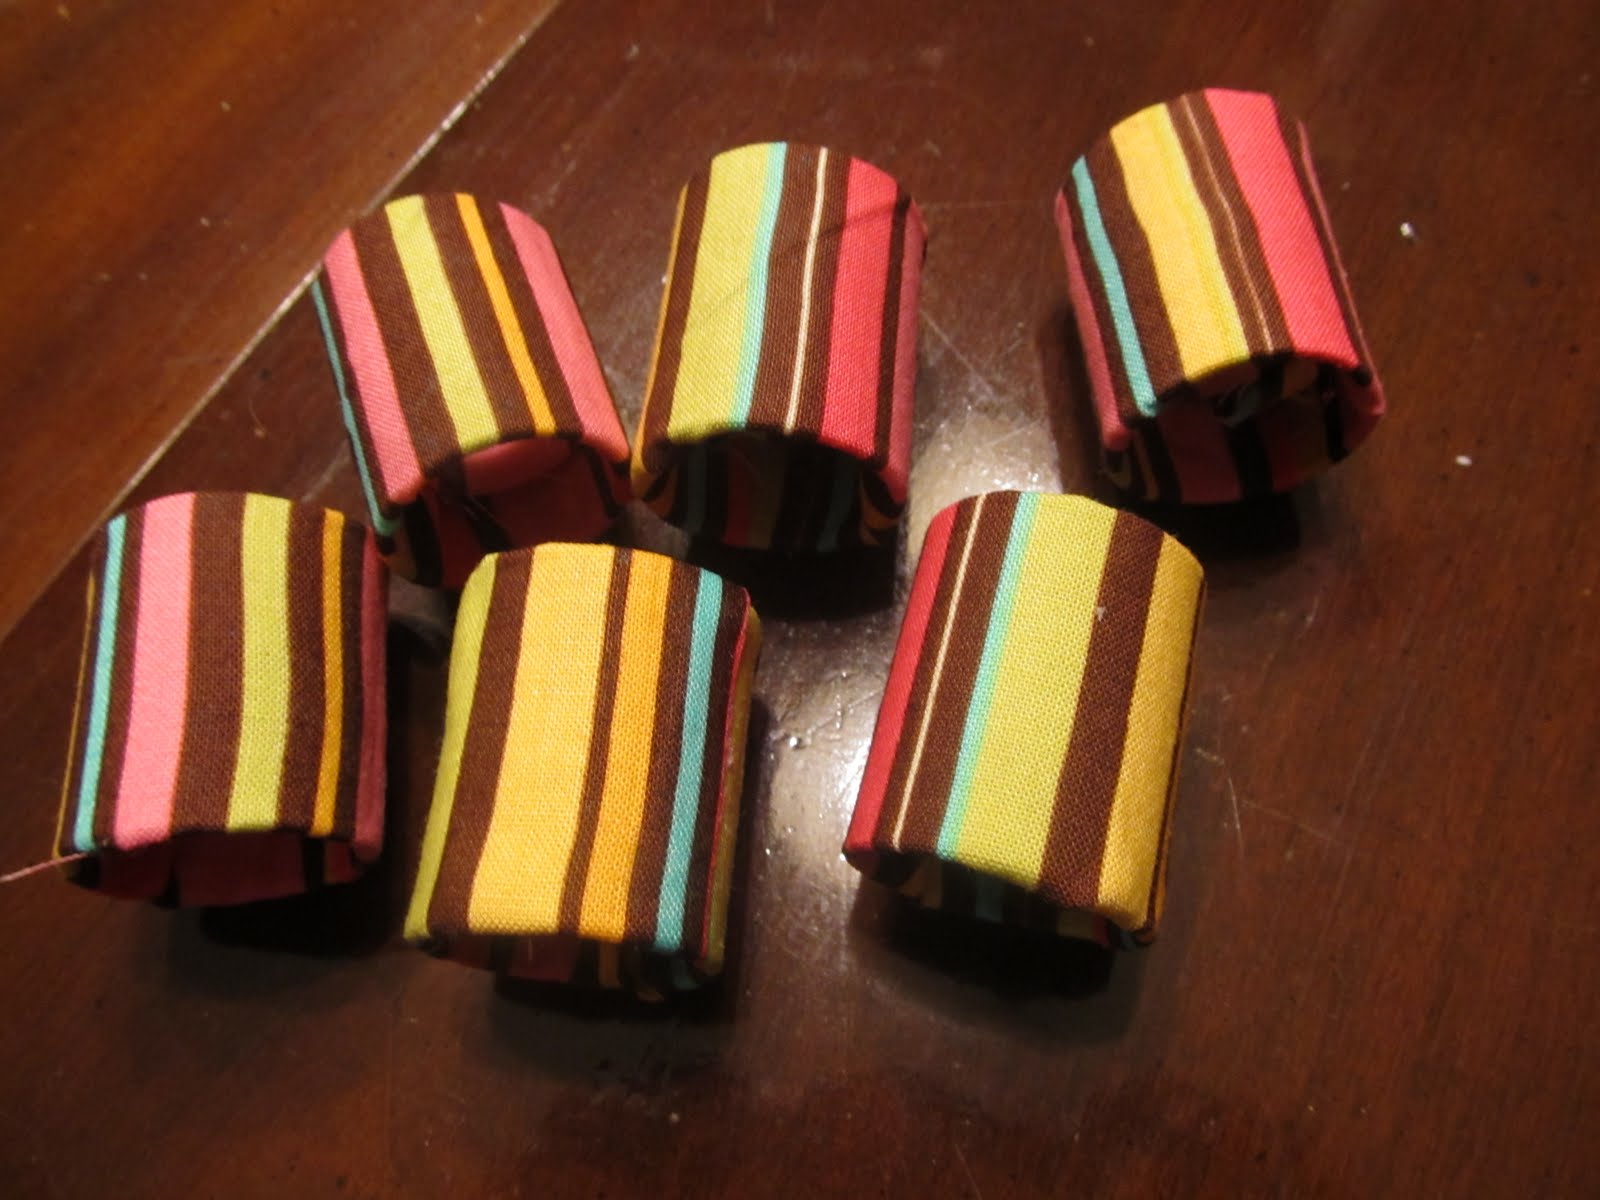
Hey everyone! As you all know I'm all about inexpensive home decor and easy diy home decor. It doesn't get much easier than these napkin rings! The best part is they're completely customizable to your decor. You can make a set for every holiday, everyday decor, or as a gift.

Supplies

Cardboard tube. (I used one from a roll of tinfoil)
Modpodge
Fabric of your choice
Pen or pencil
Sponge brush
Box cutters

First decide on the size you want. Mark on the cardboard tube where you want to cut your first napkin ring. Cut the first ring. After you cut the first ring lay it by the cardboard tube and using your pen mark where the 2nd, 3rd, and so on ring should be cut. Don't worry about the edges being uneven, you can file the ends as needed when you've got them all cut.


After you've got all of your rings cut out lay them on your piece of fabric. You'll need enough fabric to completely cover the ring and then enough fabric length wise to go inside the ring from both ends. Once you get your first square cut you can then lay that square on the fabric and cut the rest of your squares the same size until you have enough squares.


Now you're ready to start applying your modpodge. Using the sponge brush layer on the modpodge kinda thick all the away around the ring. Don't worry about getting it on you, it washes or peels off easily. Once you've got the ring covered in modpodge you're ready to put on your fabric. Hold the fabric in your hand and lay the ring right in the center of it.

Now wrap the fabric around the ring pressing it firmly onto the cardboard ring. When you get to the seam where the fabric meets and slightly overlaps press it tight and put a little modpodge down the seam. Using your brush put some modpodge on the inside of the ring. It doesn't matter how much just make sure it's all the way around it. Now push the fabric into the ring on one end. Make sure it's inside and tight around the edges. Do the same with the other end until all of the fabric is inside the ring. Now dab a little modpodge inside the ring on the fabric and smooth it over w/ your fingers. Let dry and you're done!